目录
区块链资产转移开发实操
区块链搭建+智能合约+后端 ,前端不包括在该实操
相关信息
相关信息 本文章只记录作者学习时的步骤
概述:
掌握区块链资产转移系统的智能合约和后端开发。
一. 前置准备
概述:
熟悉区块链资产转移实验案例的流程。
任务步骤:
1.阅读以下内容并熟悉实验的整体流程
实验采用前后端开发相关技术(后端采用Java+Springboot,MVC架构),基于实验“区块链应用原型设计“以及实验“外部应用程序与区块链交互”作为开发基础,在实现与FISCOBCOS交互的基础之上开发Asset去中心化的“资产转移”系统,其中涉及功能包括:注册、查看余额、转账3个内容,如下图所示。
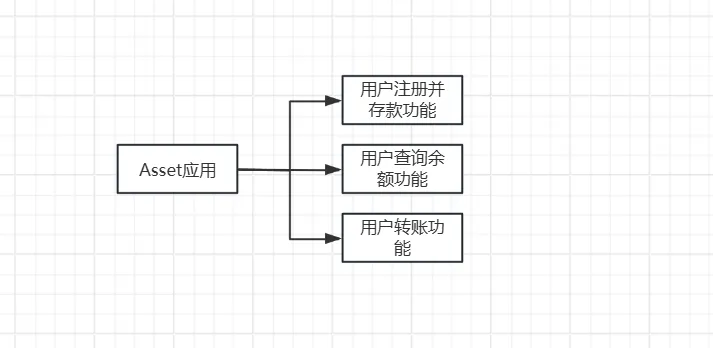 为了简化应用开发流程,本实验简化了应用开发中涉及的“中心化”,应用中涉及的 用户注册部分的功能将通过智能合约中实现,如下图为整体应用框架。
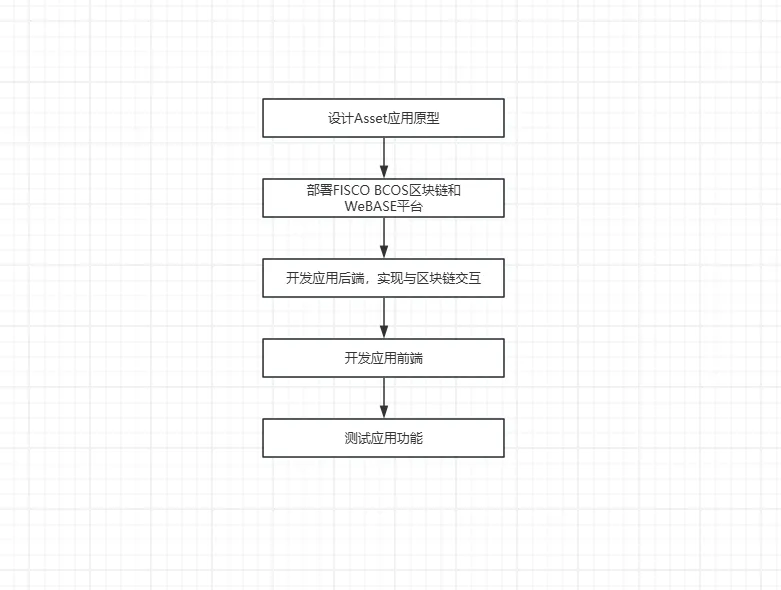
 项目流程:
项目流程:
二.设计PetStore应用的注册与登录原型
概述:
直接采用区块链账户实现PetStore应用的注册和登录。在本任务中将设计基于“去中心化的注册与登录流程”。掌握使用ProcessOn完成开发应用系统的注册与登录流程设计。
任务步骤:
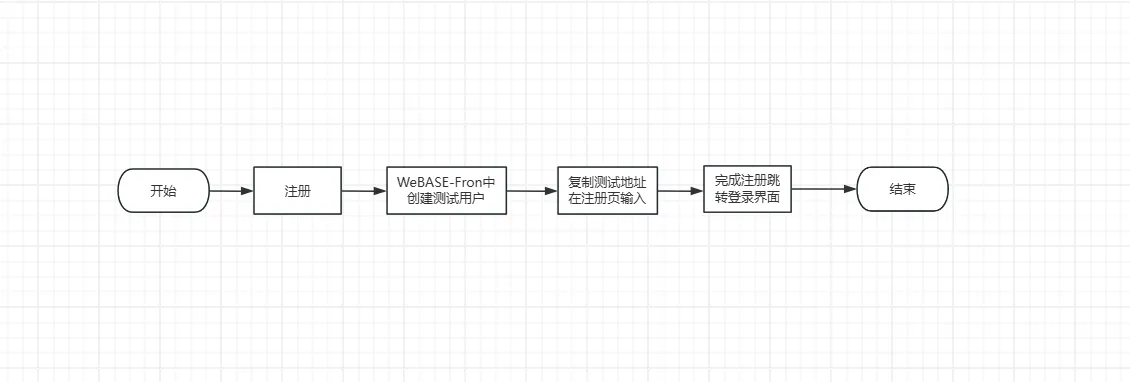
1.设计注册与登录的流程图
(1)登录ProcessOn网站(https://www.processon.com/) 设计如下的注册流程图,首先通过WeBASE-Front创建测试账户,再复制测试账户地址在注册界面填写,点击确认后完成注册跳转至登录页。
相关信息
相关信息 登录功能没写,有兴趣的话可以自己编写
三.开发Asset资产转移系统的智能合约
概述:
用Solidity 语言完成Asset智能合约的开发。
任务步骤:
1.启动联盟链节点与WeBASE-Front
相关信息
相关信息 如果没搭建联盟链的请参考 联盟链fisco-bcos使用MySQL存储引擎
(1)打开终端,该步骤在区块链供应链金融平台搭建与运维案例中已经讲解过,不再赘述。
(2)启动fiscobcos的单群祖四节点联盟链;
(2)进入WeBASE-Front所在的文件夹,并启动WeBASE-Front。
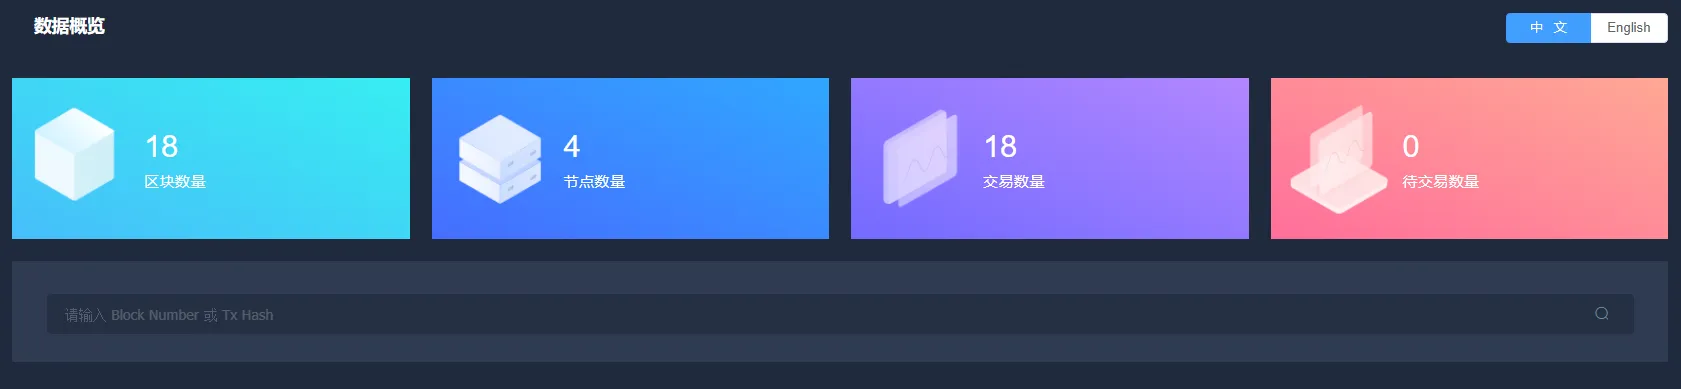
(3)登录WeBASE-Front,打开火狐浏览器,输入网址 http://localhost:5002/WeBASE-Front ,选择右上角的中文进行切换。
2.编写智能合约
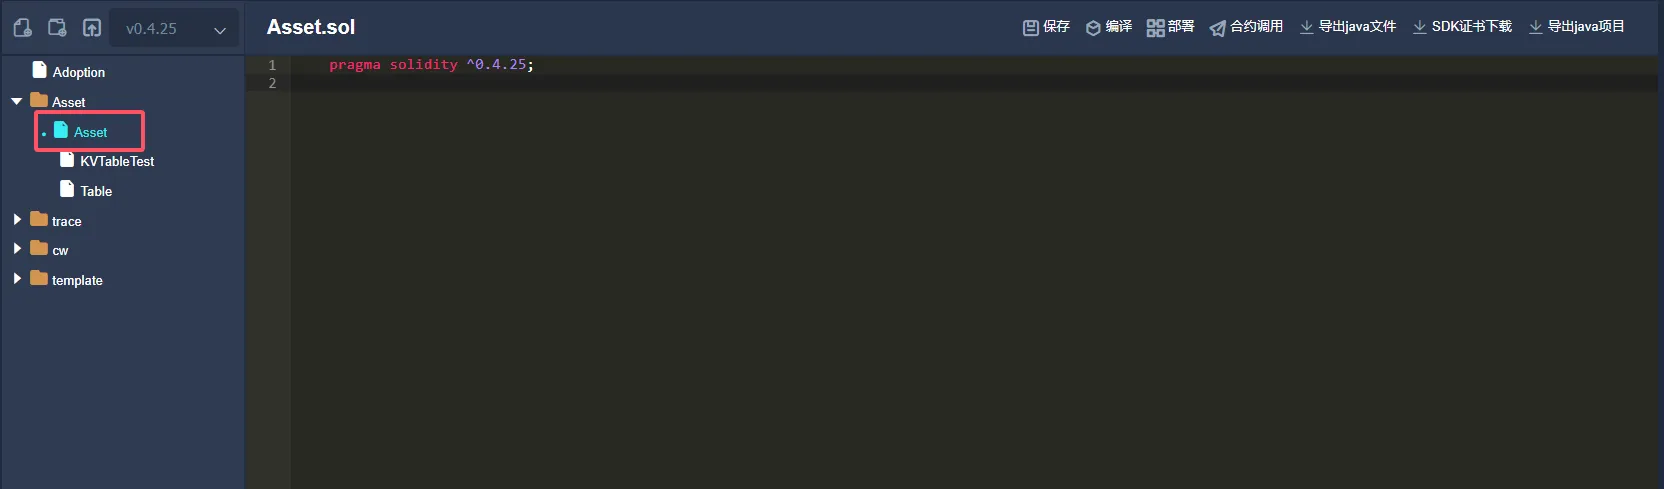
(1)进入WeBASE-Front 的”合约IDE“,新建一个Asset.sol的合约文件,可以使用命令"ctrl+-"缩放浏览器页面,确保可以看到完整代码。如下图所示。
 (2)分析合约要是实现的功能。
根据区块链资产专业前置的设计需求,首先要能实现注册的功能,以下时用户注册时和转账时的事件定义。
 (3)首先创建表用来存储用户地址以及金额,此方法的公开性为private。
 (4)创建openTable方法用来打开创建的表,此方法的公开性为private。
 (5)创建select方法用来查询表,此方法的公开性为private。
 (6)创建register方法用于用户注册,此方法的公开性为public。
 (7)创建transfer方法用来转账,此方法的公开性为public。
 (8)创建getValue方法用来查询指定用户余额,此方法的公开性为public。
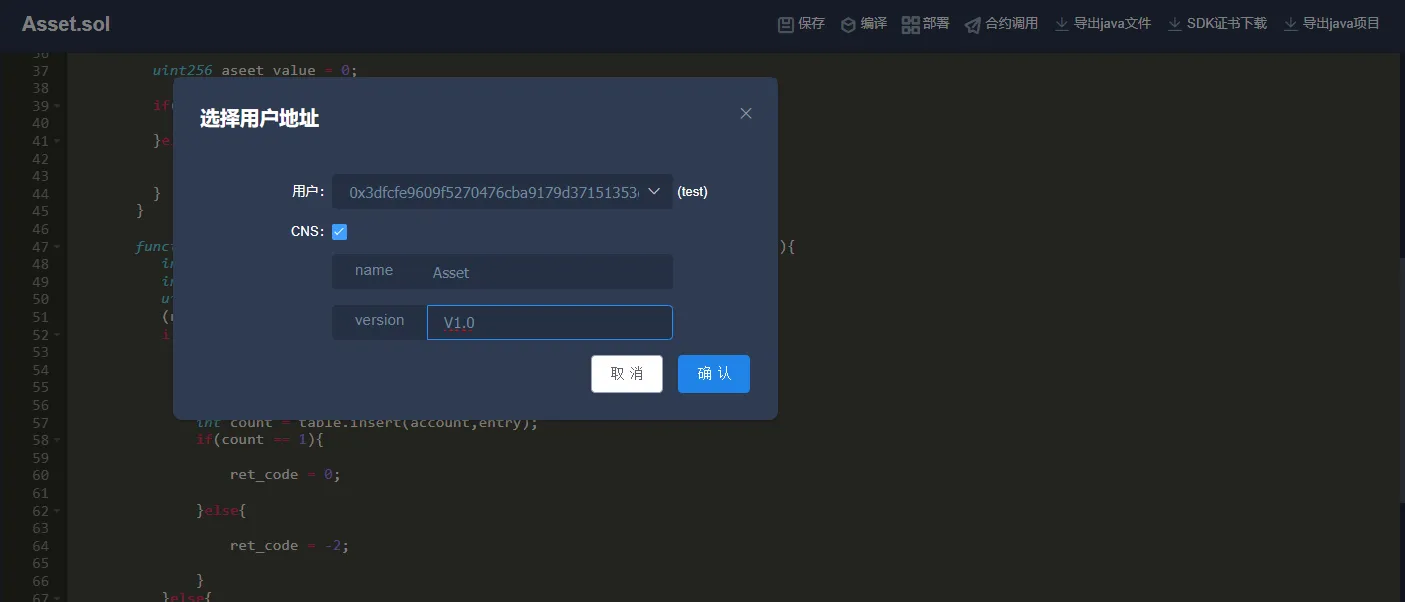
 (9)编译部署
四.Asset 区块链资产转移系统的后端代码编写
概述:
利用WeBASE-Front API 功能开发Asset 应用注册与登录功能、宠物领养与查看功能,并进行相关验证。基于Asset智能合约中login和register方法,在Asset 后端项目中添加对应的登录和注册功能以及宠物领养和查看功能。
任务步骤:
1. 创建项目 请参考 区块链商店系统开发实操
2. 业务编写 创建 Service目录在该目录下创建userSerice.java文件,复制以下代码。
javaimport cn.hutool.core.lang.Dict;
import cn.hutool.core.util.HexUtil;
import cn.hutool.json.JSONObject;
import cn.hutool.json.JSONUtil;
import org.springframework.beans.factory.annotation.Autowired;
import org.springframework.beans.factory.annotation.Value;
import org.springframework.stereotype.Service;
import top.suhm.asset.utils.IOUtils;
import top.suhm.asset.utils.WeBASEUtil;

import java.util.ArrayList;
import java.util.List;

@Service
public class userService {
    String ABI = IOUtils.readResourceAsString("abi/Asset.abi");
    String contractName = "Asset";
    @Value("${system.contract.assetAddress}")
    String contractAddress;

    @Autowired
    WeBASEUtil weBASEUtil;
    public Dict register(String account,int amount){
        Dict result = new Dict();
        if(amount < 0){
            result.set("result","金额小于0");
            result.set("code",200);
            return result;
        }
        List funcParam = new ArrayList();
        funcParam.add(account);
        funcParam.add(amount);
        result = weBASEUtil.commonReq(account, contractName, contractAddress, "register", funcParam, ABI);
        JSONObject respBody = JSONUtil.parseObj(result.get("result"));
        String output = respBody.getStr("output");
        long retInt = HexUtil.hexToLong(output.substring(2));
        result.set("result",retInt);
        result.set("code",200);
        result.set("message","添加成功!");
        return result;
    }
}
3. 创建Controller目录 在改目录下创建UserController.java文件,复制以下代码。
javaimport cn.hutool.core.lang.Dict;
import io.swagger.annotations.Api;
import org.springframework.beans.factory.annotation.Autowired;
import org.springframework.web.bind.annotation.PostMapping;
import org.springframework.web.bind.annotation.RequestMapping;
import org.springframework.web.bind.annotation.RequestParam;
import org.springframework.web.bind.annotation.RestController;
import top.suhm.asset.Service.userService;

@RestController
@RequestMapping("/user")
@Api("用户操作")
public class userController {
    @Autowired
    userService userService;

    @PostMapping("/register")
    public Dict register(@RequestParam("account")String account,@RequestParam("amount")int amount){
        return userService.register(account,amount);
    }
}
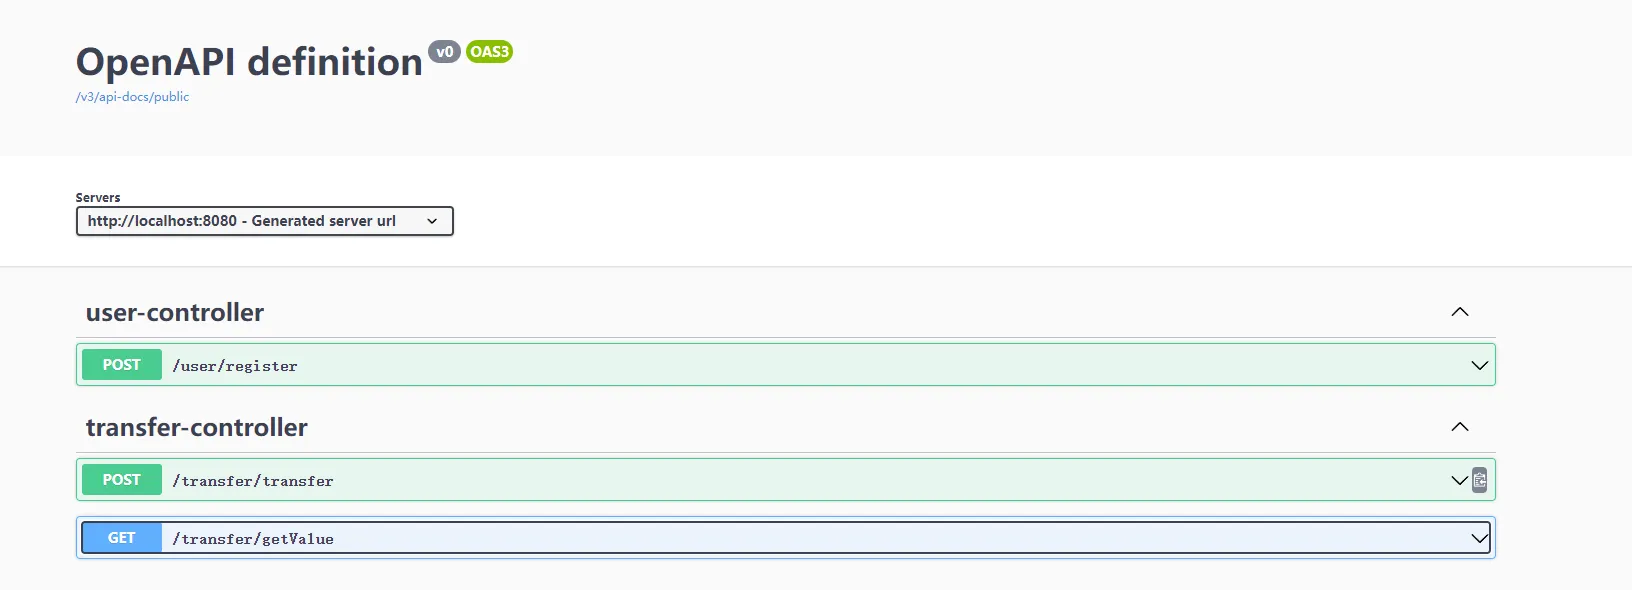
4. 启动项目 打开浏览器,访问地址http://localhost:8080/swagger-ui.html ,如果正常即会出现如下图所示的Swagger接口文档。

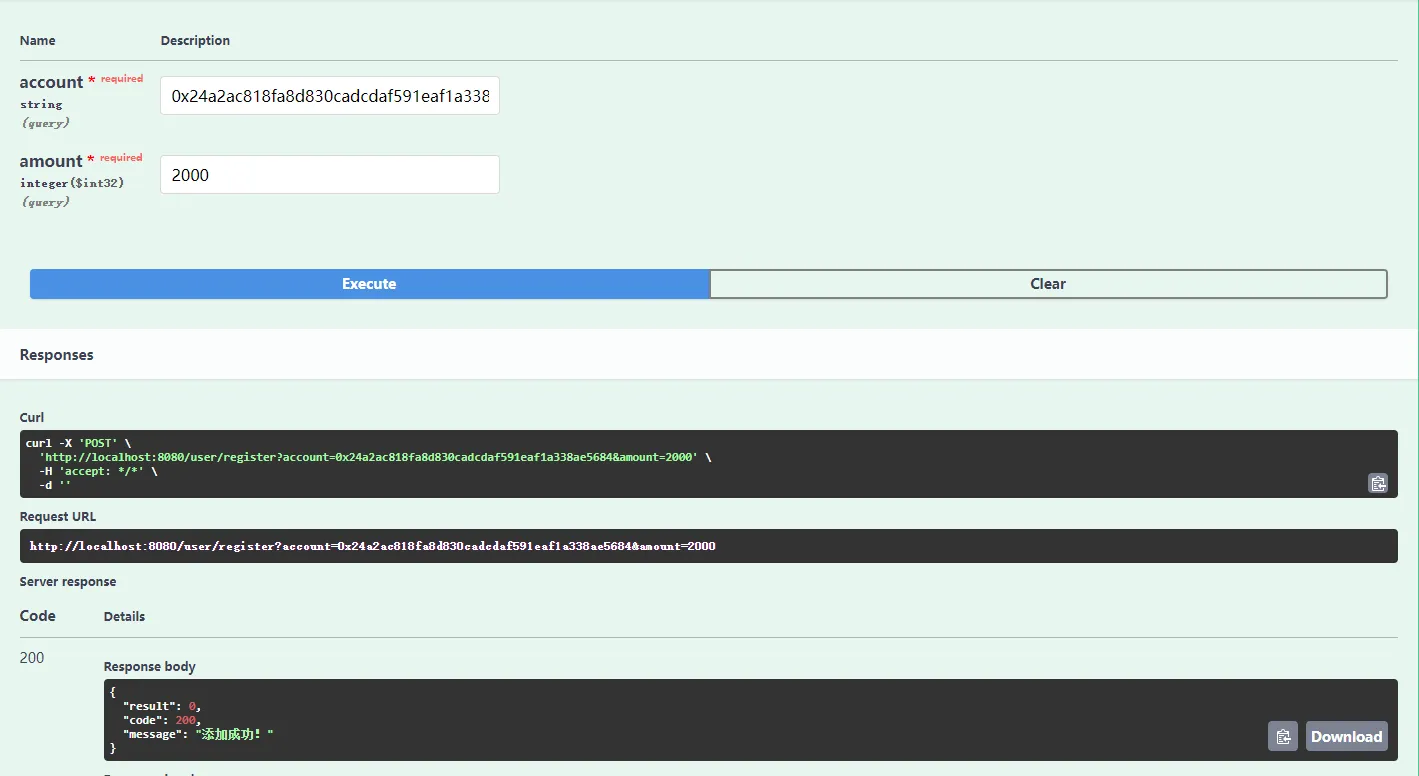
5. 复制测试地址进行测试 点击 Try it out 进行测试,注册成功返回200状态码
6. 在Service目录下创建 TransferService.java 文件,复制以下代码
javaimport cn.hutool.core.lang.Dict;
import cn.hutool.core.util.ArrayUtil;
import cn.hutool.core.util.HexUtil;
import cn.hutool.json.JSONObject;
import cn.hutool.json.JSONUtil;
import org.springframework.beans.factory.annotation.Autowired;
import org.springframework.beans.factory.annotation.Value;
import org.springframework.stereotype.Service;
import top.suhm.asset.utils.IOUtils;
import top.suhm.asset.utils.ResultCodeEnum;
import top.suhm.asset.utils.WeBASEUtil;

import java.util.ArrayList;
import java.util.List;

@Service
public class TransferService {

    @Autowired
    WeBASEUtil weBASEUtil;

    String contractName = "Asset";
    @Value("${system.contract.assetAddress}")
    String contractAddress;

    String ABI = IOUtils.readResourceAsString("abi/Asset.abi");

    public Dict transfer(String fromAccount, String toAccount, int amount) {
        Dict result = new Dict();
        if (amount < 0) {
            result.set("result", "转账余额小于0");
            result.set("code", 200);
            return result;
        }
        List funcParam = new ArrayList();
        funcParam.add(fromAccount);
        funcParam.add(toAccount);
        funcParam.add(amount);

        result = weBASEUtil.commonReq(fromAccount, contractName, contractAddress, "transfer", funcParam, ABI);
        String respStr = result.getStr("result");
        JSONObject respBody = JSONUtil.parseObj(respStr);
        String output = respBody.getStr("output");
        long reInt = HexUtil.hexToLong(output.substring(2));
        result.set("result", reInt);
        result.set("code", 200);
        result.set("message", ResultCodeEnum.getMessageByCode((int)reInt));
        return result;
    }
    public Dict getValue(String account){
        List funcParam = new ArrayList();
        funcParam.add(account);
        System.out.println(ArrayUtil.toString(funcParam));
        Dict result = weBASEUtil.commonReq(account, contractName, contractAddress, "getValue", funcParam, ABI);
        JSONObject respBody = JSONUtil.parseObj(result.get("result"));
        System.out.println(respBody.toString());;
        String output = respBody.getStr("output");
        long retInt = HexUtil.hexToLong(output.substring(2));
        result.set("result",retInt);
        result.set("code",200);
        return result;
    }
}
7. 在Controller目录下创建 transferController.java文件,复制以下代码
javaimport cn.hutool.core.lang.Dict;
import io.swagger.annotations.Api;
import org.springframework.beans.factory.annotation.Autowired;
import org.springframework.web.bind.annotation.*;
import top.suhm.asset.Service.TransferService;

@RestController
@RequestMapping("/transfer")
@Api("转账操作")
public class transferController {
    @Autowired
    TransferService transferService;

    @PostMapping("/transfer")
    public Dict transfer(@RequestParam("fromAccount") String fromAccount,
                         @RequestParam("toAccount") String toAccount,
                         @RequestParam("amount") int amount){
        return transferService.transfer(fromAccount,toAccount,amount);
    }

    @GetMapping("/getValue")
    public Dict getValue(@RequestParam("account")String account){
        return transferService.getValue(account);
    }
}
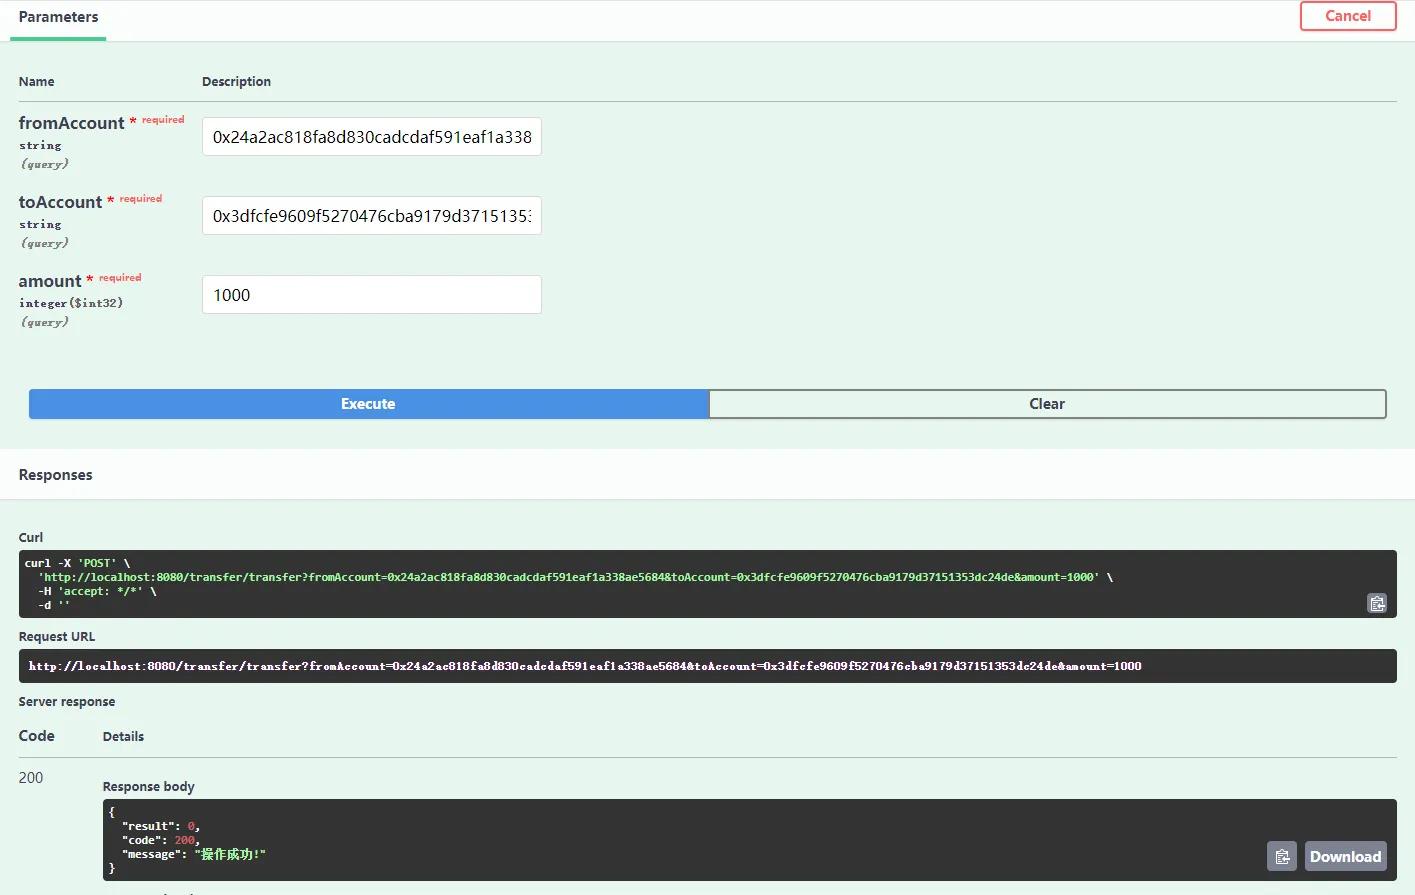
8. 重启项目 测试接口 成功会出现下图内容
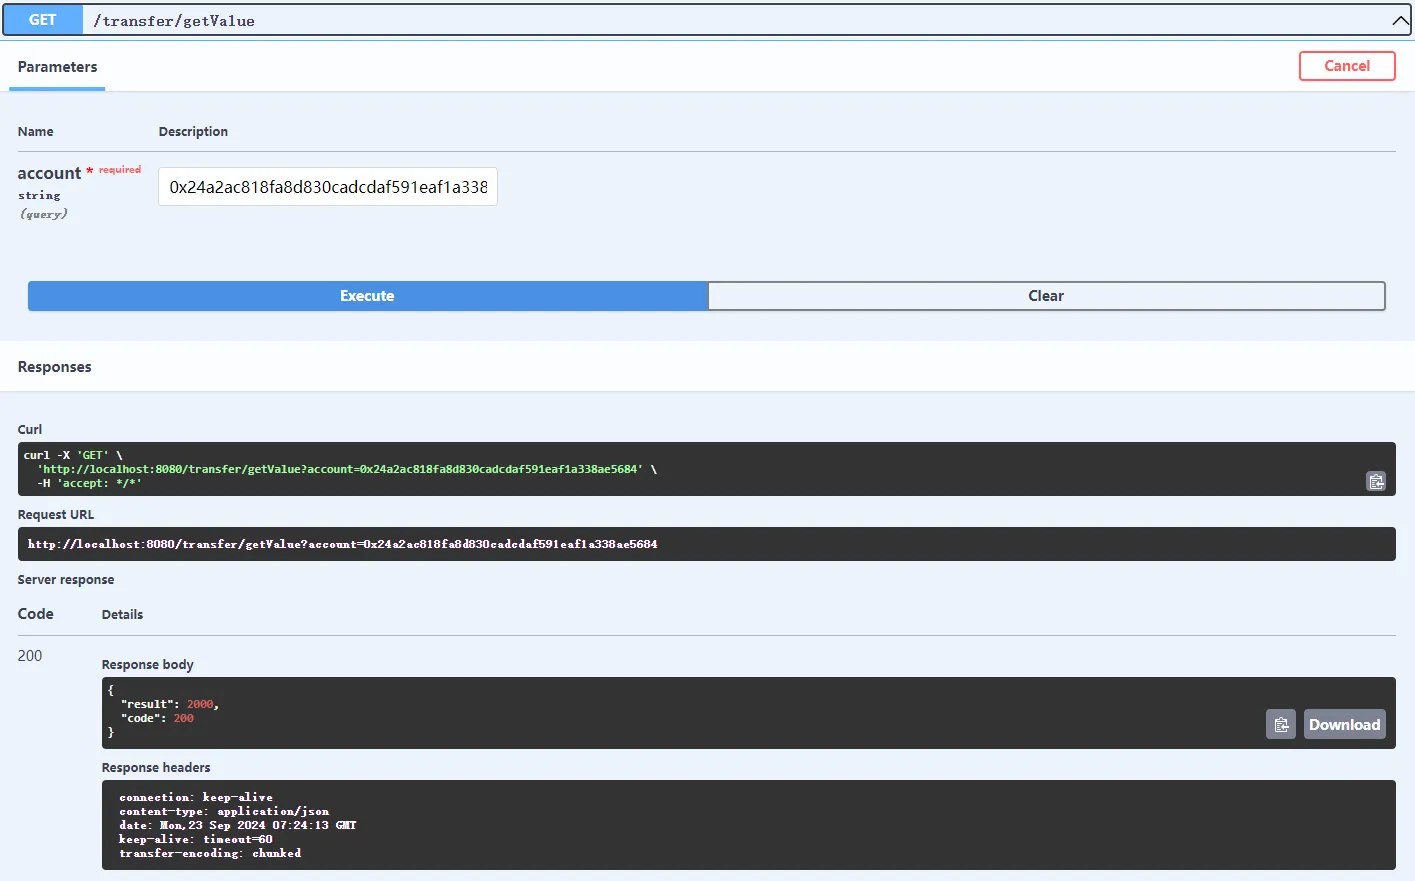
9. 测试getValue接口 将注册的地址复制到getValue参数内进行调用,如下图。
10. 测试transfer接口,需要再注册一个地址,在此之前我已经注册
 至此项目就结束了,当然还有些bug没做,比如发起转账的对象和接收对象不能是同一个这类的,有兴趣的可以自己做一下。如果有不明白的地方请参考 区块链商店系统开发实操
相关代码IOUtil
javaimport lombok.extern.slf4j.Slf4j;

import java.io.*;

@Slf4j
public class IOUtil {
    private IOUtil(){}

    private static final int BUF_SIZE = 2048;

    public static String readAsString(File file) throws IOException {
        try(InputStream in = new FileInputStream(file)){
            ByteArrayOutputStream baos = new ByteArrayOutputStream();
            copy(in, baos);
            return new String(baos.toByteArray());
        }
    }

    public static String readResourceAsString(String resource){
        ClassLoader classLoader = Thread.currentThread().getContextClassLoader();
        try(InputStream in = classLoader.getResourceAsStream(resource)){
            return readAsString(in);
        }
        catch (IOException ex){
            log.error("Error reading resource",ex);
            return null;
        }
    }

    public static String readAsString(InputStream inputStream) throws IOException {
        ByteArrayOutputStream baos = new ByteArrayOutputStream();
        copy(inputStream, baos);
        return new String(baos.toByteArray());
    }

    public static void writeString(File target, String template) throws IOException{
        ByteArrayInputStream baos = new ByteArrayInputStream(template.getBytes());
        try(FileOutputStream fos = new FileOutputStream(target, false)){
            copy(baos, fos);
        }
    }

    public static void copyFolder(File srcDir, final File destDir) throws IOException{
        for(File f: srcDir.listFiles()){
            File fileCopyTo = new File(destDir, f.getName());
            if(!f.isDirectory()){
                copyFile(f, fileCopyTo);
            }
            else{
                if(!fileCopyTo.mkdirs()){
                    throw new IOException("Dir "+fileCopyTo.getAbsolutePath() + " create failed");
                }
                copyFolder(f, fileCopyTo);
            }
        }

    }

    public static void copyFile(File src, File tgt) throws IOException{
        try(FileInputStream fis = new FileInputStream(src);
            FileOutputStream fos = new FileOutputStream(tgt, false)){
            copy(fis, fos);
        }
    }

    public static void copy(InputStream is, OutputStream os) throws IOException{
        try(BufferedInputStream bis = new BufferedInputStream(is); BufferedOutputStream bos = new BufferedOutputStream(os)){
            byte[] buf = new byte[BUF_SIZE];
            int n;
            while ((n = bis.read(buf)) != -1){
                bos.write(buf, 0, n);
            }
            bos.flush();
        }
    }

    public static void removeItem(File item) {
        if(!item.isDirectory()){
            item.delete();
            return;
        }

        for(File subItem: item.listFiles()){
            removeItem(subItem);
        }
    }
}
本文作者:苏皓明
本文链接:
版权声明:本博客所有文章除特别声明外,均采用 BY-NC-SA 许可协议。转载请注明出处!